Jars of Halloween Treats — Stampin’ Up! Artisan Blog Hop

Welcome to another Stampin’ Up! Artisan Design Team Blog Hop!  There are 20 of us from around the globe who will be sharing our projects with you twice each month.  All you need to do to follow along is click on the link at the bottom of each post.

Our focus for this hop is the Jar of Haunts stamp set.  I love how it coordinates with the other jar stamp sets and the Everyday Jars Framelits dies that Stampin’ Up! offers.

I am not a very organized scrapbooker.  Some people like to do all of their pages chronologically or have different books for different themes/occasions.  I take more of a random/haphazard approach.  If I get a picture printed, I set it aside to be scrapped, and occasionally that gets done and stuck in a book.  I do try to insert the pages in chronological order in my scrapbooks, so I’m not totally unorganized.  🙂

halloween-scrapbookThis is a picture of my girls ready to head out for trick or treating.  I used some of the Halloween Night dsp and the Jar of Haunts stamp set to make the page, which is sized at 8″ x 8″.  I used the Labeler Alphabet stamp set to create the title and date.

halloween-scrapbook-close-upThese jars are so easy to “fill” with whatever you’d like.  That is one of the great features of the photopolymer stamps — easy placement.

I don’t tend to make many cards for Halloween, but I love to make treats for the occasion. The girls give them to friends and teachers.

halloween-treat-bagI love the Glassine Gift Bags because they are the perfect size for a cookie or other homemade treat.  I put a Halloween decorated sugar cookie in this bag, decorated with a sleeve made from the Halloween Night dsp.  The sleeve measures 2″ x 12″, and then I folded it in half, punched a couple of holes at the top and tied the bow.

The cute pumpkins were made with the Jar of Haunts stamp set.  Lots of different images in this set — some cute and some scary!

halloween-treat-bag-close-upThe pumpkins were stamped on Shimmery White Cardstock and colored with an aquapainter and blender pen.

You’re ready to hop on over to The Netherlands and visit Chantal de Kaste’s blog by clicking on the link below.  You can use Google Translate for any blogs for which you need translation help.  It’s so fun to hop around the world!

bloghop-button_0915-1


Product List

A Kinda Eclectic Scrapbook Page

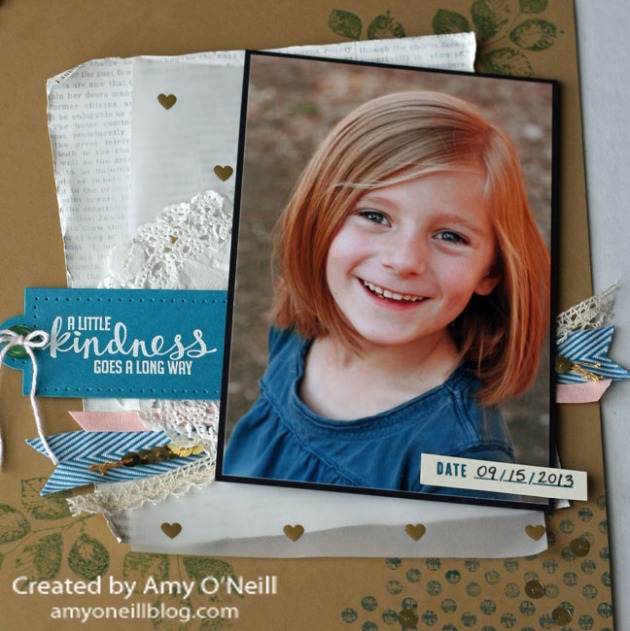
KE ScrapbookI’ll bet you’ve figured out by now that Kinda Eclectic is probably my favorite new stamp set in the annual catalog this year.  So I figured that it was the perfect set to scrapbook one of my favorite photos of my youngest child.

KE Scrapbook Close Up 1I started by layering some Typeset dsp, which I had painted with a layer of gesso, and some of the Gold Fancy Foil Designer Vellum behind the photo.  I wrinkled up a doily and layered some pretty ribbons as well.  The sentiment was stamped and embossed with white Stampin’ Emboss Powder.  I added some stamping on the Crumb Cake page and some sequins.  And then I embellished with lots of butterflies.

This page was made for the convention display boards to show how once could use the Kinda Eclectic stamp set for scrapbooking.  Since this set is perfect for layering, it is a great set for scrapbooking.

All of the convention display stampers are posting their projects to a special Pinterest board so you can see all of the display projects in one convenient place.  Just click on the button below to see it.

Enjoy your Saturday!  Thanks for stopping by!

Scrapbooking the Traditional Way with Project Life by Stampin’ Up!

In addition to the three convention sets we were given to make display board samples, we were also given some Project Life goodies to use.  Today I want to show you how can use Project Life products to scrapbook in a traditional way.

AB Scrapbook

I used some items from the Everyday Adventure Accessory Pack and Card Collection.  The accessory pack includes the epoxy stickers, banner stickers, and washi tape as well as many more items which I didn’t use here.

AB Scrapbook Close Up 3

AB Scrapbook Close Up 1


I also used some of the stamps from the Project Life Point & Click Stamp Set and some in-color sequins.  And I also added some crazy stitching with my sewing machine.

AB Scrapbook Close Up 4I used one of the stamps from Amazing Birthday for the title of the page.  Sometimes making a 12 x 12 page can be a little intimidating because you have so much space to fill.  But these little cards make it pretty easy.  They enable you to focus on one small space at a time, and everything coordinates.

So, what do you think?  Are you more of a traditional scrapbooker or do you like the new Project Life pocket-style of scrapbooking?  I like them both!

All of the convention display stampers are posting their projects to a special Pinterest board so you can see all of the display projects in one convenient place.  Just click on the button below to see it.

Enjoy your Thursday!  Thanks for stopping by!


Project Life Easter Page

So, have you heard that Stampin’ Up! has partnered up with Project Life?  A match made in heaven, I tell you!  Project Life is a scrapbooking system that provides a quick and easy way to document your life with pictures and journaling.

In honor of National Scrapbooking Day yesterday, I decided that I needed to get started with my Project Life album and I made two pages in less than an hour.  Normally, when I scrapbook it takes me a couple of hours (at least) to make one page.  I think I’ll get even faster with making my Project Life pages once I get better with printing and taking my pictures.  That tells you how often I actually take them off my phone and camera and print them out.  🙂

Here’s a helpful tip for you if you choose to use Project Life.  When I take pictures, I don’t worry about whether I’m taking them with a portrait orientation or a landscape orientation.  But with the Project Life photo sleeves, it helps to be consistent.  There are pages for both orientations, so you can choose either way.

Here’s a page I made to document our Easter weekend.

PL Easter

What makes Project Life so easy and quick is that you just slide your photos in the photo sleeves.  Then you can add some of the cards.  Some cards have lines or room for journaling and some are just for decoration.

PL Easter card 1

On this card I also used some alphabet stickers which are included in the accessory pack to spell out “Easter.”  The date stamp at the bottom of the card is from the Day to Day photopolymer stamp set.

PL Easter card 2On this card, I stamped the Strawberry Slush border on Whisper White card stock with the new Point and Click photopolymer stamp set.  The Pear Pizzazz arrow is from the same set.  I then used one of the new Cards & Labels Project Life framelits dies to cut it out.

Here’s a look at the new products available now.

Enjoy your Sunday!  Thanks for stopping by!

An Epic Day with Maggie — Monday Montage #14

Monday Montage Banner -- October


We’re back with another Monday Montage blog hop for you tonight.  There are ten of us participating, and you can easily make your way through the hop by clicking on the “Next” or “Back” buttons at the bottom of each post.  I have an 8″x8″ scrapbook page to share with you this time.

Some of you may remember that when I was at Convention last summer, my family adopted a dog while I was gone.  I came back to find an adorable two-year old Pug named Maggie.  Well, Maggie is a full-fledged member of the family now, and I have loved to see how she has bonded with each of us, especially my nine-year old daughter who paid for the adoption and feeds Maggie every day.  Maggie runs upstairs and waits patiently outside Kendall’s door each morning until Kendall wakes up, and then gives Kendall an excited greeting.  And Kendall always makes time to love her dog back.

Before Christmas, I was taking some shots of the kids for Christmas cards and of course, Maggie had to be included.  I decided I needed to make a scrapbook page to remember our first real photo shoot with Maggie.

Epic Day with Maggie copy


I went back to an old favorite, the Epic Day This and That suite of products for my layout. I also used one sheet of the Kaleidoscope dsp (the Basic Gray graph paper background sheet).

There are some really fun Epic Day This and That Designer Stickers that coordinate with the dsp, and I used several of them on this layout.  It makes for a quick and easy page.

Epic Day with Maggie close-up1


Epic Day with Maggie close-up2


I love scrapbooking, and I really should do it more.  It is what first drew me into this papercrafting hobby.  And my kids love looking back through pages like this.  This page will actually be going up on a bulletin board in our home office/craft room for a while.

You’re ready to hop on over to Breelin Renwick’s blog and check out her amazing creation. If you’d rather work your way backwards, you’re welcome to hop on over to Wendy Weixler’s blog and see some of her awesome-sauce work.  Either way, be sure to make your way through the other nine posts.

mondaymontageback (1)

mondaymontagenext copy

Enjoy your Sunday evening!  Thanks for stopping by!

Hello, Lovely Week —

mondaymontageheader

It’s time for another Monday Montage Blog Hop!  I love seeing what the other designers have to share each time, and I hope you enjoy the links to see the work of these great designers.

I thought it would be fun to have another theme week on this blog where one stamp set is featured for the entire week.  And the stamp set I chose for this week is Hello, Lovely.

I’m starting tonight with a scrapbook page that I made for the Convention display boards. It’s a page that features my youngest child.

Hello Lovely Display Scrapbook

To start this page, I started with a 12″ x 12″ page of Whisper White card stock and trimmed it down to about 11″ x 11″.  I then mixed some Strawberry Slush re-inker and rubbing alcohol, and using a spritzer, I spritzed the page to add some color.  I then used the Petite Pennants Builder punch and punched out a banner, which I then traced with a pencil across the spritzed card stock.  I used an exacto knife to cut out the banners.  I then placed a sheet of Coastal Cabana polka dot dsp from the Color Collection dsp stack behind the white spritzed sheet.  My cut-out banners then appeared as Coastal Cabana polka dot banners.  I added some punched out Crisp Cantaloupe patterned banners in between the Coastal Cabana banners, and lots of little embellishments.

Hello Lovely Scrapbook Close Up 2

I added some crazy machine stitching and other embellishments in the top corner.

Hello Lovely Scrapbook Close Up

I added some more embellishments in the bottom corner.  The stamps in this set are so fun for scrapbooking.

Hello Lovely Scrapbook Close Up 3

Now you’re ready to hop on over to Breelin Renwick’s blog and check out her amazing project.  If you prefer, you can go backwards and see Wendy Weixler’s awesome project.  Either way, make sure you hop through all ten projects so you don’t miss out!

mondaymontageback (1)

mondaymontagenext copy

Enjoy your Sunday evening!  Thanks for stopping by!

Artisan Finalist Blog Hop — Day 10

2013artisanfinalistAWell, here we are at the last day of the blog hop for those of us who were selected as Stampin’ Up! Artisan finalists, but who were not chosen for the design team.

My last project for you is a scrapbook page.  It includes pictures of my son, and I’ve tried to achieve a grungy look.

Artisan Brother Scrapbook PageThis page was so much fun to make.  It is so not my normal style, but once I got started, I really liked it.  After making this page, I was ready for the Gorgeous Grunge set to come out.  And now, I have to say,  I really like this grungy look.

Here’s a closer look at some of the stamping and embellishments.  I usually find that I don’t do a lot of stamping on my scrapbook pages, but that was not true with this page.  I stamped all over the place!

Artisan Brother Scrapbook Page Close Up 1Here’s a closer look at the “doo-dads” in the top left corner.  I love the way this turned out.

Artisan Brother Scrapbook Page Corner Close UpNow you’re ready to hop on over to Breelin Renwick’s blog to continue along the blog hop trail.  She has been so inspiring over these past few days!  If you’d prefer to work your way backwards, you can do that too by clicking on the link for Wendy Weixler’s blog below.  Not only has it been so fun to see her amazing entries, but I have so enjoyed getting to know her a little better.  She is one amazing lady!

2013artfinalistback copy2013artfinalistnext copy

I hope you’ve enjoyed getting to see these ten projects as well.  Entering this contest is always a lot of work, but I feel like a grow a little more as a stamper each time, and I always come away with new friendships and great experiences.  Thanks for letting me share part of that with you.

Enjoy your Monday evening!  I’ll be back with regular programming tomorrow.  Thanks for stopping by!

Supplies Used:
Stamps:  Blue Ribbon, Designer Typeset Photopolymer Stamps, World’s Greatest, Remember This and That Rotary Stamp, Hey There (My Paper Pumpkin)
Ink:  Midnight Muse, Tangerine Tango, Basic Gray, Crumb Cake, Pool Party, Versamark, Whisper White Craft
Paper:  Pool Party Core’dinations Card Stock, Tangerine Tango, Basic Gray, Whisper White, Midnight Muse, Pool Party, Epic Day This and That Designer Series Paper, Summer Smooches Designer Series Paper, Silver Glimmer Paper
Accessories:  Regals Designer Buttons, Pool Party Baker’s Twine, Rhinestone Basic Jewels, 1-1/4” Circle Punch, 2-3/8” Scallop Circle Punch, Adorning Accents Edgelits, Apothecary Accents Framelits, 3/16” Brights Brads, Pewter and White Stampin’ Emboss Powders, Epic Day This and That Designer Washi Tape, Midnight Muse 3/8” Stitched Satin Ribbon, Very Vanilla ½” Seam Binding ribbon (dyed with Basic Gray ink), sewing machine, Color Spritzer Tool, Stampin’ Sanding Block

Artisan Finalist Blog Hop — Day 6

2013artisanfinalistAI really hope you’ve been enjoying the blog hop for the ten Artisan Finalists which are not on the design team.  I’ve enjoyed looking at all of the details on the other finalists’ projects.  And I’ve picked up a few tips and techniques along the way.

Today I have another scrapbook page for you.

Artisan Love U2 Scrapbook Page


This one has a picture of my two girls which was taken a few years ago.  That was the best picture day ever for the two of them — lots of spontaneous hand-holding, and genuine, happy smiles.  I will definitely treasure all of the photos I got of them on that day!

To draw the eye to the picture, I used a paint brush and brushed a layer of gesso on the dsp under and above the photo.

Artisan Love U2 Scrapbook Page Close Up 1I used a mix of heart punches and framelits to cut out a bunch of hearts from various dsp collections, and then I used my sewing machine to stitch them down.  I also did some stitching around the edge of the page.

Artisan Love U2 Scrapbook Page Close Up 3For the page title, I die cut the letters from Silver Glimmer paper and placed them on a scalloped heart from the Hearts Collection framelits.  It is actually vellum paper which I misted with a mixture of Melon Mambo re-inker and rubbing alcohol.

Artisan Love U2 Scrapbook Page Close Up 2One of the things that I love about scrapbooking 12″ x 12″ pages is that there is almost always room for little “doo-dad” embellishments.

Next up on the hop is Breelin Renwick.  I have so enjoyed looking at her entries!  If you prefer to go backwards (that is perfectly alright), you can visit Wendy Weixler’s blog, and peruse her beautiful project.

2013artfinalistback copy

2013artfinalistnext copy

Enjoy your Thursday evening!  Thanks for stopping by!

Supplies Used:
Ink:  Melon Mambo Classic Stampin’ Ink Refill
Paper:  Melon Mambo, Island Indigo, White Vellum Card Stock, Whisper White, World Spectacular Designer Series Paper, 2011-2013 In Color Designer Series Paper Stack, Sunshine & Sprinkles Designer Series Paper, Brights Collection Designer Series Paper Stack, Summer Smooches Designer Series Paper, Floral District Designer Series Paper, Tea for Two Designer Series Paper, Silver Glimmer Paper
Accessories:  Hearts Collection Framelits, Labels Collection Framelits, Full Heart punch, Small Heart Punch, Hearts a Flutter Framelits, Vintage Faceted Designer Buttons, Island Indigo Baker’s Twine, Typeset Alphabet Bigz die, Rhinestone Basic Jewels, Brights Designer Buttons, Victoria 5/8” Crochet Trim, Tea Lace Paper Doilies, Artisan Embellishments Kit, Dotted Scallop Ribbon Border Punch, Stampin’ Spritzer , Vanilla Shimmer Smooch Spritz, Sewing Machine, Gesso
Font:  Bradley Hand ITC


My Favorite Scrapbook Page

Of all the scrapbook pages I made for the convention display boards, I think this one is my favorite.  I don’t know if it’s because I really liked the layout and products on this page or if it’s because this is one of my favorite pictures of my littlest one.

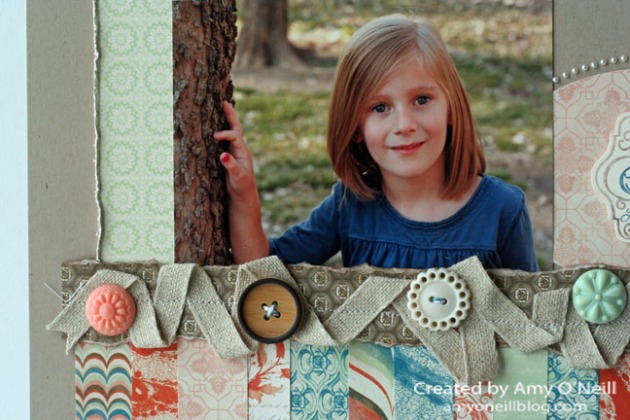
Lovely Romance ScrapbookI decided to embrace the bold patterns in the dsp and  let them be the star of the page, so I used a Crumb Cake background and three of the more subtle patterns in the dsp package for the accents.  I cut lots of different sized and different patterned banners and placed them all under a strip of neutral dsp.

Lovely Romance Scrapbook Close Up 1Then I looped some of the Natural 7/16″ Trim on the dsp and used my sewing machine to hold it down.  I then added some buttons and In-Color Boutique Details as embellishments.

Lovely Romance Scrapbook Close Up 2For the page title, I used one of the Apothecary Accents dies to cut the dsp and then placed little Pearl Basic Jewels around it.  I used the fun Remember This and That Rotary
Stamp for the date.

Enjoy your Monday!  Thanks for stopping by!  Come back tomorrow for two more Lovely Romance projects.


A Gorgeous Grunge Scrapbook Page


I don’t show scrapbook pages very often (mainly because I don’t make them very often anymore :)).  I made this page for the Convention display boards, and used the Gorgeous Grunge stamp set and a couple of others.  I used the This and That Epic Day dsp, which is a perfect dsp to use with the Gorgeous Grunge set — it looks like they were made for each other.

Gorgeous Grunge Display ScrapbookI also used the That’s the Ticket stamp set and coordinating punch for an accent.  The large glimmer paper letters are from the Typeset Alphabet Bigz dies, and the alphabet which runs down the side is from the Designer Typeset Photopolymer stamp set.

Gorgeous Grunge Display Scrapbook Close UpHere’s a closer look at the Gorgeous Grunge set in action in the bottom corner.  It also shows the very fun  Remember This and That Rotary Stamp, which I think is a must-have for any scrapbooker.

Gorgeous Grunge Display Scrapbook Close Up 2I have been very touched by all of the kind comments I received yesterday.  Thank you!  If you missed it, I am giving away some blog candy to celebrate my first year anniversary of blogging.  See yesterday’s post for a chance to win.

Enjoy your Tuesday!  Come back tomorrow and I’ll have another Gorgeous Grunge card for the new Freshly Made Sketches challenge.  Thanks for stopping by!