Lots of Hearts

I pulled out an older set, Hearts a Flutter, and decided to play with it this past weekend.  I used one of my misters with some Blushing Bride ink diluted in rubbing alcohol and misted my white card base.  Then I stamped some of the heart shapes randomly on the card.  I die cut the word “love” using one of the Expressions Thinlits dies out out of the Red Glimmer Paper.  A pretty quick and simple card.

Lots of HeartsEnjoy your Tuesday!  Thanks for stopping by!


Love U

I hate to rush from one holiday to another, but it’s time for me to start thinking about Valentine’s Day.  With two of my kids having birthdays that week (one is actually on Valentine’s Day and the other is on the 16th) and lots of class parties, that is a busy time.  So the more I can do to prepare now, the better off I’ll be then.

Love UI was totally inspired by this beautiful card made by Barbara Anders.  I cased her layout and used different products and colors for my card.

Enjoy your Thursday!  Thanks for stopping by!

Supplies Used:
Paper:  Real Red, Basic Black, Silver Glimmer Paper, Modern Medley dsp, Subtles DSP stack
Embellishments:  Expressions thinlits dies, Typeset Alphabet Bigz dies, Hearts Collection framelits dies, Basic Rhinestone Jewels


Valentine Brownies

Happy Valentine’s Day!  I hope you receive some special Valentine’s treat today, whether it be chocolate, flowers, a sweet card, or to just hear the words, “I love you.”

Here are the treats I made for my children, husband, and a favorite teacher.

Valentine Brownies -- group

I didn’t want to put too much effort into them, as I know my children will tear into them without spending much time examining the packaging.  However, I still wanted them to be special.

Valentine Brownie

I used some glassine bags that I had on hand.  And what’s inside the bags, you might be asking?  Well, I think the title of my post gave it away, but I put heart-shaped brownies inside.

brownies

Hmmm… they don’t look too appetizing in this picture, but they really are good.  I think I need to practice my photography of food.  I’m not very experienced at that.  🙂

I hope you have a great Valentine’s Day!  Thanks for stopping by!

Supplies Used:
Stamps:  That’s the Ticket
Ink:  Pool Party
Paper:  Very Vanilla, More Amore Specialty dsp
Embellishments:  Ticket Duo Builder punch, Hearts a Flutter framelits, Pearl Basic Jewels, Pool Party 3/8″ Ruffled Ribbon and Baker’s Twine, Tea Lace Paper Doilies

Last Valentine’s Card (?)

Last Valentine's Card

I needed one more Valentine’s card that I could easily stick in the mail, so I made one more card yesterday.  I think this may be my last one.

I used the sketch over at Retro Sketches for this card.

I really didn’t stray from the sketch at all, which shows how much of a rules follower I am.  🙂  It also shows how quickly I had to make the card to get it in the mail in time.  That’s one great thing about sketches — they can save time thinking of a layout.

So are you ready for Valentine’s Day tomorrow?  I finished my second grader’s gifts for her classmates yesterday.  And I finished my kids’ treat sacks yesterday.  Now all I have to do is do some baking today.  I’ll post some pictures tomorrow.

Have a great Wednesday!  Thanks for stopping by!

Supplies Used:
Stamps:  Teeny Tiny Wishes
Ink:  Basic Black
Paper:  Pool Party, Basic Gray, Primrose Petals, Very Vanilla, More Amore specialty dsp
Embellishments:  5/8″ Flower Trim, Pearl Basic Jewels, Hearts a Flutter framelits, Hearts Collection framelits, Finishing Touches edgelits, Color Spritzer Tool


A Sent with Love Valentine

Sent with Love Valentine

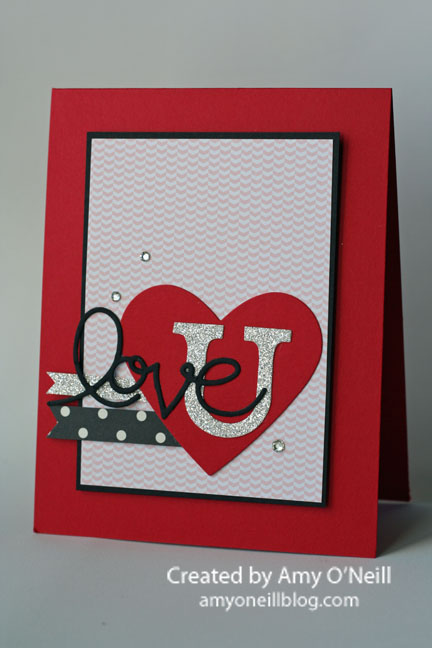
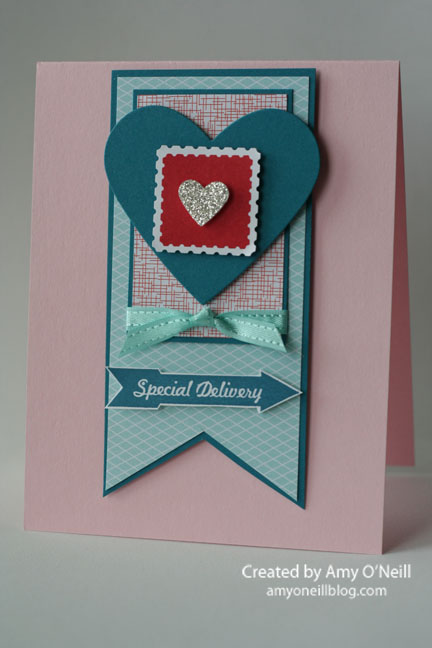
I needed to get some Valentines in the mail today, and so many of the ones I’ve made over the past couple of months aren’t easy to mail.  I ordered the new Sent with Love bundle and it has been patiently sitting by my desk waiting to see some love.  I’ve been so busy with other projects that I haven’t been able to even open it up.  But I figured I had the perfect excuse today.   I must say that I LOVE this bundle!  The colors are right up my alley and I love all of the stamps in the set, and the dsp has lots of great patterns.

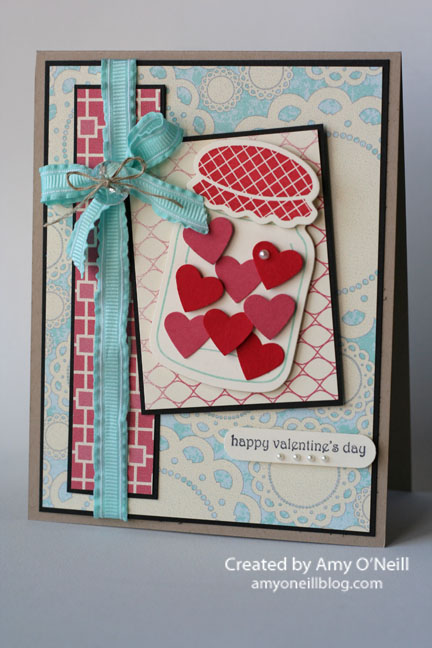
Since I knew this card would be going in the mail, I tried to make it as flat as possible.  I’m just not a one layer kind of girl though.  So I tried to avoid big bows and buttons and bulky things like that.

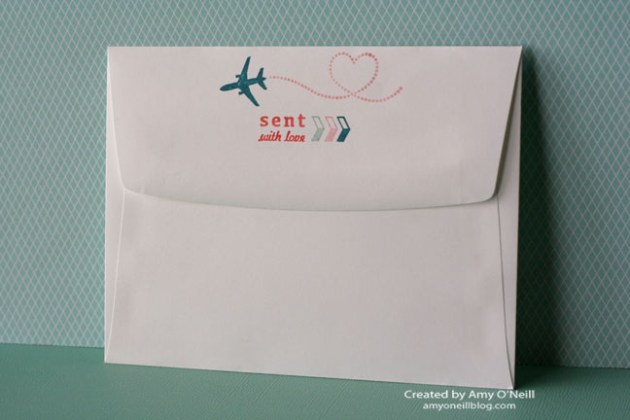
When I first saw this stamp set, I immediately thought about how fun it would be to use to decorate envelopes.  Now I confess that I don’t normally decorate envelopes.  I’m lucky to get a card in the mail.  🙂

Sent with Love Envelope - Front

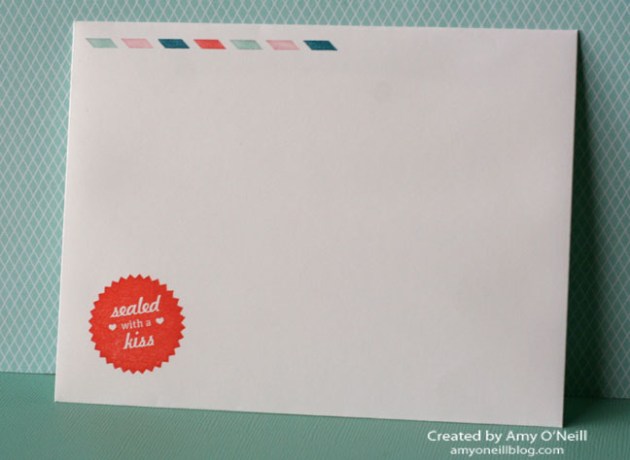
This is what I did with the front of the envelope.  And here’s what I did with the back:

Sent with Love Envelope - Back

This bundle would be great for scrapbooking travel-related pages, but I think it will be fun for card making and even more fun for decorating envelopes.

Sent with Love Stamp Set copy
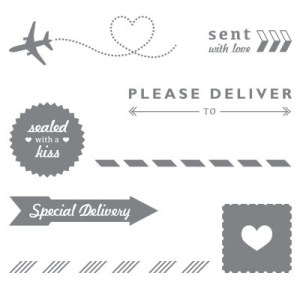
Sent with Love Stamp Set #131847

     sent with love dsp copy
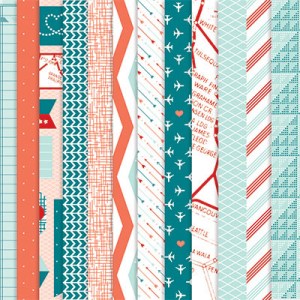
Sent with Love Designer Series Paper #132182

Item Description Price
131847 Sent with Love Stamp Set (clear-mount; English only) $17.95
132182 Sent with Love Designer Series Paper $10.95
132851 Sent with Love Bundle Includes the Sent with Love Stamp Set, Sent with Love Designer Series Paper, and Calypso Coral Baker’s Twine $25.50 20% off retail value!

Enjoy your Tuesday!  Thanks for stopping by!

Supplies Used:
Stamps:  Sent with Love
Ink:  Real Red, Pink Pirouette, Island Indigo, Calypso Coral, Pool Party
Paper:  Pink Pirouette, Island Indigo, Whisper White, Silver Glimmer Paper, Sent with Love dsp
Embellishments:  Small Heart punch, Full Heart punch, Postage Stamp punch, Sycamore Street Ribbon & Button pack

Forever & Always

When I saw the Tuesday Trigger over at Moxie Fab World, I immediately knew what I wanted to make (and that very rarely happens).  I adore the colors in this picture and the clean, fresh image really appeals to me.  Cath picks some of the best inspiration photos.

Forever & Always

I embossed the woodgrain stamped background with white embossing powder.  That’s for the chair in the picture.  I dry embossed the little x’s at the bottom with the Needlepoint Borders embossing folder.  That’s for the big cross-stitches on the pillow.

Enjoy your Wednesday!  Thanks for stopping by!

Supplies Used:
Stamps:  Hearts a Flutter, Loving Thoughts, Woodgrain
Ink:  Pool Party, Primrose Petals, Versamark
Paper:  Pool Party, Whisper White, Primrose Petals, More Amore Specialty dsp
Embellishments:  Hearts a Flutter framelits, Needlepoint Borders embossing folder, Tea Lace Paper Doilies, White Stampin’ Emboss Powder, Pearl Basic Jewels, Artisan Embellishments Kit, Full Heart Punch

A Clustered Valentine

Doily Lacy Valentine

I’ve got another Valentine’s card for you today.    I used some of the Core-dinations cards stock on this one.  It’s my first time to try it out.   I decided I really like it for two reasons.  The first is that its texture on one side reminds me of the textured card stock Stampin’ Up used to offer (I miss that stuff!).  The other reason is that when you sand an embossed image, it really shows up.  Very fun!

I clustered some of my favorite elements on this one — I adore the scalloped heart in the Hearts a Flutter stamp set, the flower trim, pearls, and tickets.  Here’s a closer look:

Doily Lacy Valentine close-up

Thank you to all of you who left comments yesterday with ideas for how I could use yesterday’s card.  Y’all had so many good ideas that now I think I need to make more of this card!

Enjoy your Friday!  Thanks for stopping by!

Supplies Used:
Stamps:  Hearts a Flutter, That’s the Ticket
Ink:  Primrose Petals, Versamark
Paper:  Pool Party, Basic Gray, Pink Pirouette, Real Red, Pool Party Core-dinations, More Amore Specialty dsp
Embellishments:  5/8″ Flower Trim, Tea Lace Paper Doilies, Hearts a Flutter framelits, Delicate Designs Folders, Pearl Basic Jewels, Ticket Duo Builder punch, Primrose Petals 3/8″ Stitched Ribbon

A Valentine Treat

Valentine treat

Here’s a simple little treat that would make your Valentine quite happy — who wouldn’t love to get some chocolate?  And when it’s wrapped in a pretty little package, it tastes even better, right?  🙂

To make the topper, I just cut a piece of Pool Party card stock with one of the Labels Collection framelits, and then ran it through the Big Shot with the Perfect Polka Dots embossing folder.  I then folded it in half and added a couple of embellishments.

Enjoy your Wednesday, and may it include a little chocolate treat!  Thanks for stopping by!

Supplies Used:
Stamps:  Hearts a Flutter, Teeny Tiny Wishes
Ink:  Pretty in Pink, Real Red
Paper:  Pool Party, Whisper White, Real Red
Embellishments:  Small Heart Punch, Hearts a Flutter framelits, Labels Collection framelits, Rhinestone Basic Jewels, Perfect Polka Dots embossing folder, Real Red 1/8″ Taffeta Ribbon

Jar of Hearts

Jar of Hearts

I never got tired of the Perfectly Preserved set in the Fall catalog.  Fortunately, Stampin’ Up carried it over into the Spring catalog (see page 36 in the Spring catalog for products carried over).  I have seen some other cards on Pinterest that use this same theme and decided to make one for myself.  Karen Giron’s card really caught my eye, so I decided to make it using Stampin’ Up products.

I have to say that while making this card, I kept humming Christina Perry’s song, “Jar of Hearts,” and now it’s stuck in my head again as I type this post.  🙂

Enjoy your Tuesday!  Thanks for stopping by!

Supplies Used:
Stamps:  Perfectly Preserved, Teeny Tiny Wishes
Ink:  Pool Party, Real Red, Basic Black
Paper:  Crumb Cake, Basic Black, Very Vanilla, More Amore Specialty dsp
Embellishments:  Cannery Set framelits, Small Heart punch, Word Window punch, Pool Party 3/8″ Ruffled Ribbon, Linen Thread, Vintage Faceted Designer Buttons, Pearl Basic Jewels

A Valentine Banner

I have a Fall banner and a Christmas banner which I hang over the fireplace every year. I’m always a little sad when I have to take the Christmas one down because I think my mantle looks so bare. Never mind that it’s made even barer because all of the Christmas decorations are gone.  I also have a Spring banner, but it’s too early for that right now, so I was determined to make a Valentines banner.  Valentines Day is extra special in our house because my older daughter is a Valentines baby.   I didn’t have a lot of time to spend on making a banner though, so I needed to keep it pretty simple.  Here is what I ended up with:

Valentine Banner full

I made each panel the same for simplicity’s sake.

Valentine Banner single

I just fed each panel through my sewing machine to connect all of the panels (of course the one I photographed has a crooked row of stitching ;)).  That makes it easy to store for future use and it makes it easy to hang.

Valentine Banner midsize

I used the largest sized pennant from the Perfect Pennant Bigz die.  The hearts are from the Hearts-a-Flutter framelits, and the buttons are from the Sale-a-Bration Sycamore Street Ribbon and Button pack, which will be available January 22nd.

Enjoy your Wednesday!  Thanks for stopping by!

Supplies Used:
Stamps: none (gasp!)
Ink:  none (gasp!)
Paper:  Real Red, Pool Party, Red Glimmer Paper, More Amore Specialty dsp
Embellishments:  Sycamore Street Ribbon and Button pack (available Jan. 22), Pool Party Baker’s Twine, Hearts-a-Flutter framelits, Finishing Touches edgelits, Perfect Pennants Bigz die, Chevron embossing folder