Presents under the Trees — Monday Montage #57

Monday Montage Banner -- OctoberWelcome to another Monday Montage blog hop!  There are ten of us who love to share what we create, and all you have to do to follow along is click on the links at the bottom of each post.

Now that Thanksgiving is over, there is no denying that Christmas is quickly approaching. I just need to embrace it and dive right in, so I decided to make a Christmas card for today.

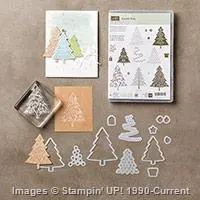
I pulled out my Peaceful Pines set and coordinating framelits because I have so much fun decorating these cute trees.   I went with a traditional colors scheme of red and green, more specifically — Cherry Cobbler, Old Olive and Mossy Meadow.  I also threw in some touches of gold because I have been a little obsessed with gold accents lately.

Trees with Presents
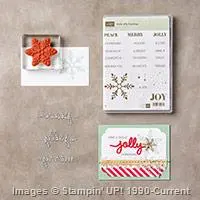
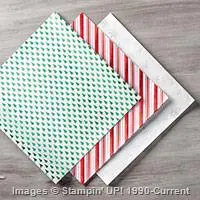
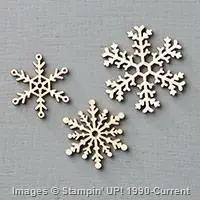
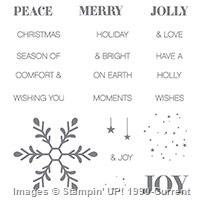
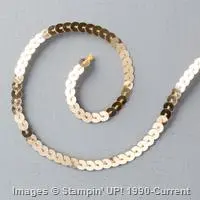
I started with a Crumb Cake card base and layered on a sheet of the Holidays Fancy Foil Designer Vellum.   Then I took a piece of Whisper White card stock and stamped some little stars and dots from the Holly Jolly Greetings stamp set with gold ink.  I added some gold thread and sequins and a fun Snowflake Element and Metal Rimmed Pearl.

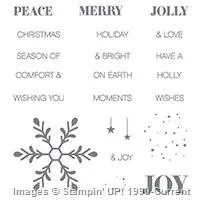
I stamped the trees with Versamark ink and used clear and white Stampin’ Emboss Powder on Old Olive and Mossy Meadow card stock, and then cut them out with the Perfect Pines Framelits Dies.  The sentiment was cut with a Christmas Greetings Thinlit die from Red Glimmer Paper, and the “Christmas” is a stamp from the Holly Jolly Greetings set, which I embossed with Gold Embossing Powder.

Trees with Presents Close UpThis would not be a card I would want to mass produce, but it’s perfect to send to a special someone.

You’re ready to hop on over to Breelin Renwick’s blog for a huge dose of beautiful creativity.  If you prefer to work your way backwards, you can hop over to Wendy Weixler’s inspiring blog.  Either way, be sure to work your way through all ten links.

mondaymontageback (1)mondaymontagenext copy

When creating this card, I decided to play along with Sandy’s current challenge at The Paper Players.  I haven’t done that in a while, and they always have great challenges.

I went with the “Patterned Paper, Sparkle or Shine, and Tree” column.  Or I could say I went with the “Snowflake, Sparkle or Shine, and Punch or Die-Cut” diagonal.  Or how about the “White, Embossing, and Punch or Die-Cut” column.  Just call me indecisive!

Enjoy your Monday!  Thanks for stopping by!

A Merry Snowman — FMS214

It’s time for another sketch challenge over at the Freshly Made Sketches site, and this week our most talented pilot friend, Jennifer Timko, is our hostess.  She has a fabulous sketch for us, and I think it is so easy to use in a variety of ways.

While it may not look like it at first glance, I did try to stay true to the spirit of the sketch.  You just have to look for it.

Merry SnowmanI just love this happy little snowman from the Snow Place stamp set.  And he is so fun to decorate.  I decided to dress him up a bit with a hat and tie.

I started out by lightly sponging some Pool Party ink onto the card base.  Then I stamped and embossed the snow flakes with some white embossing powder and placed some white sequins from the Metallic Sequin Assortment on some of them.

The “merry” is from the Christmas Greetings Thinlits Dies.  I cut out some of the Red Foil Sheets with the die.  The “Christmas” is from the Holly Jolly Greetings stamp set.

Merry Snowman close upWe hope you’ll play along and make your own card using the sketch!  You can jump over to the Freshly Made Sketches site for a dose of creative inspiration to get you started.

Enjoy your Wednesday, and have wonderful Thanksgiving!  Thanks for stopping by!


Wonderland Pines — FMS213

Is it just me, or do the weeks seem to fly by at warp speed in November and December?   We have another Wednesday already, and that means it’s time for another sketch over at Freshly Made Sketches.  This week it is my turn to be the hostess, and I am so excited to see what you do with the sketch.

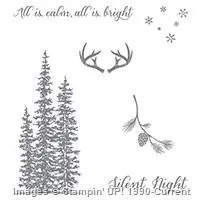
I have a set, Wonderland, that I fell in love with from the Holiday catalog that I hadn’t inked up yet, so I decided it was high time to use it.  I inked up the stamp with the beautiful trees with Old Olive ink and stamped off once before stamping on my card stock.  I did this a couple of times and then repeated this with Mossy Meadow ink.

When I was finished with the trees, I stamped the snowflakes with gold ink and the sentiment with black.

Pine WonderlandThe strip of dsp at the bottom of the card is from the Winter Wonderland Designer Vellum Stack.

I added a Snowflake Element and some gold cording and thread, and called it a day.  This card came together so quickly and easily.

Pine Wonderland Close UpWe’d love to see your creation using the sketch.  If you’d like some creative inspiration, you should check out what the design team made at the Freshly Made Sketches site.

Enjoy your Wednesday!  Thanks for stopping by!

Remarkable You with a Watercolor Wash — Monday Montage #56

Monday Montage Banner -- October
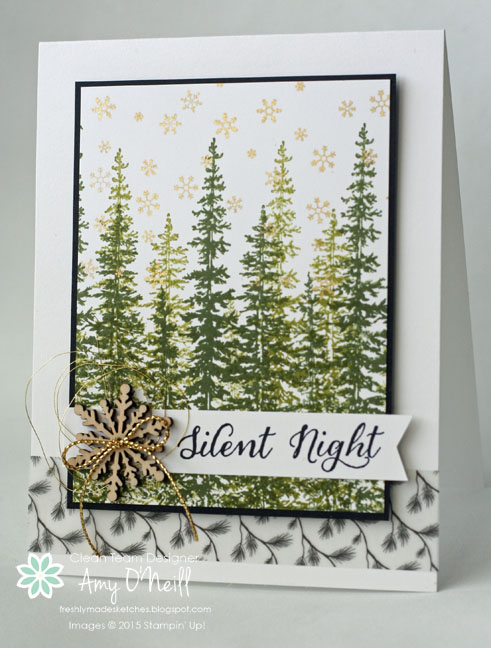
Welcome to another Monday Montage blog hop!  There are ten of us stampers who love to share what we create every other week.  All you have to do to follow along is to click on the link at the bottom of each post.

I have been admiring so many of the beautiful cards that feature a watercolor washed background out in blog land lately.  It is such an easy technique and can work with so many stamps, so I decided to make another card using this technique.

I started by pulling out my Remarkable You stamp set and some watercolor card stock.  After brushing the watercolor paper with some water to get it a little wet, I dipped my wet paintbrush in some Crushed Curry, Tangerine Tango, and Old Olive inks and brushed them over the paper where I planned to place my stamped image.  After the card stock had completely dried, I embossed the stamped image with white embossing powder.

Watercolored Remarkable YouI then added some black ink splatters and using my fine tip glue pen, added some tiny dots of Gold Stampin’ Glitter.  I also added some gold sequins from the Gold Sequin Trim and some Pumpkin Pie and Old Olive sequins from the Brights Sequin Assortment.

I’ve also been hooked on using touches of black on my cards, so I added the sentiment from the Greetings Thinlits Dies and some peeks of the black striped Winter Wonderland Designer Vellum.

Watercolored Remarkable You Close UpI made this card for a display board sample at the Dallas On Stage Stampin’ Up! event yesterday, which was so much fun.  They gave us copies of the upcoming (releases in January) Occasions Catalog and the Sale-a-Bration brochure, and I am so excited!  There are so many fabulous products in them.  I know I need to focus on finishing up Thanksgiving and Christmas stamping first, but my mind is already thinking about how I want to use some of these new products.

Another fun thing about the On Stage event yesterday — they announced the new Artisan Design team, and I’m pretty sure my name was on the list.  I say “pretty sure” because to tell you the truth, I’m still pinching myself in disbelief, and the whole experience of the announcement yesterday is pretty much a blur.  I was given a beautiful box (with a couple of cool gifts in it) but unfortunately, I can’t show it quite yet because it has some new product on it from the upcoming Occasions catalog and we’ve been asked (told) not to show any sneak peeks.

I am really looking forward to this next year, and I’m so grateful for this Monday Montage team.  We have all entered this contest in the past, and some of my teammates are past winners and some will be future winners.  They are so supportive and inspire me all of the time to try new things and grow.  I love them!

You’re ready to hop on over to the incredible Breelin Renwick’s blog for a huge dose of creativity.  If you prefer to work your way backwards, you can hop over to Wendy Weixler’s blog to see her amazing work.  Either way, be sure to work your way through all ten blogs.

mondaymontageback (1)mondaymontagenext copy

Enjoy your Monday!  Thanks for stopping by!

Merry Presents — FMS212

Are you ready for another sketch challenge at Freshly Made Sketches?  Well, it’s Wednesday so that means we have one for you.  And this week, our good friend from Australia, Narelle Farrugia, has a great sketch for us:

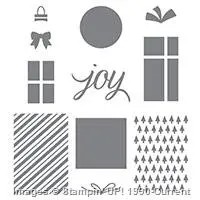
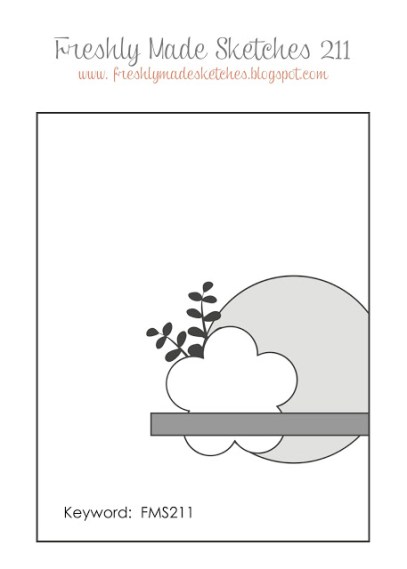
When I saw this sketch, I immediately thought of the squares as presents.  So I pulled out the Your Presents set.  I stamped and cut out the presents and then added some ribbon and baker’s twine for embellishments.

Merry GiftsI also used some little stamps from the Jolly Christmas set for the background and added some dots of Gold Stampin’ Glitter and sequins.  All in all, this was a quick and easy card.

Merry Gifts Close UpWe hope you’ll join us and make your own card using the sketch.  Be sure to venture over to the Freshly Made Sketches site and see what the design team made for some inspiration.

Enjoy your Wednesday!  Thanks for stopping by!

Snowflake Penguin — FMS211

It’s time for another sketch challenge over at Freshly Made Sketches, and this week our super talented friend from New Zealand, Karren Johnson, is our hostess.  And she has a beautiful collage-style sketch for us:

One of my very favorite sets in the Holiday Catalog is Snow Place.  But since snow has been nowhere near a possibility here, I haven’t even inked it up.  Snow is still nowhere near a possibility here as today is supposed to be in the 70s, but I have seen on the news that some other parts of the country have already seen some.  Yikes!

Snowflakes and PenguinI love all of the little accessories that come with this stamp set.  I chose to use the cute Santa hat and bow tie for this particular little guy.

The large snowflake in the circle is from the Holly Jolly Greetings stamp set.  I used Pool Party ink with it.

I also used a little Dazzling Diamonds glitter as I find it difficult to not use it on a snow-themed card.

Snowflakes and Penguins Close UpWe hope you’ll join us and make your own card using the sketch.  We love to see your creativity at work.  Meanwhile, you can hop on over to the Freshly Made Sketches site and see what the design team made for some inspiration.

Enjoy your Wednesday!  Thanks for stopping by!

Celebrate a Fall Birthday — Monday Montage #55

Monday Montage Banner -- OctoberWelcome to another Monday Montage Blog Hop!  We are a group of ten stampers who love to share our creations with you every other week.  All you have to do to follow along is click on the links at the bottom of each post.

My Grandmother is celebrating her 89th birthday next week so I wanted to make a special card for her.  I am still drawn to Fall-themed products right now, so I decided to make a Fall-themed birthday card.

Celebrate Fall BirthdayThis card didn’t require any stamping, but it did use a lot of fun products.  I started with a Kraft cardstock base, and then cut out a leaf from white Corrugated Paper (this stuff is so cool) using one of the Leaflets Framelits Dies.  I spritzed the leaf with a mixture of rubbing alcohol and Pumpkin Pie Ink.  I then added some splatters of Early Espresso and Cajun Craze inks, and sponged a little Pumpkin Pie ink around the edges.  Some gold sequins from the Metallic Sequins Assortment finished off the leaf.

The sentiment is one of the Expressions Natural Elements, which I sponged with some Early Espresso ink.  I added a strip of Gold 3/8″ Glitter Ribbon and Venetian Crochet Trim, and a bow made of Linen Thread decorated with a leaf from Into the Woods Elements, which I also sponged with Early Espresso ink.

Celebrate Fall Birthday Close UpThis was all placed over some looped Gold Metallic Thread.  A strip of Winter Wonderland Designer Vellum was placed on the bottom of the card base.

You’re ready to hop on over to Breelin Renwick’s blog for a dose of her amazing creativity.  If you prefer to work your way backwards, you can venture over to Wendy Weixler’s beautiful blog.  Either way, be sure to work your way through all ten blogs.

mondaymontageback (1)mondaymontagenext copy

Enjoy your Monday!  Thanks for stopping by!