Noel Pines — FMS266

It’s time for another sketch over at Freshly Made Sketches, and this week I get the pleasure of being the hostess.  How fun!  One of my favorite card styles is what I’d call simple collage style.  I love a little gathering of fun elements for a focal point.  Based on that, here is our sketch for the week:

fms-final-266-001

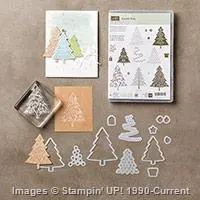
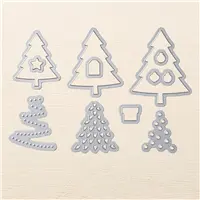
I put a heart and circle on the sketch, but feel free to change them out for any shapes you wish.  Continuing with a Christmas theme, I used pine branches and pine cones.

noel-pinecones
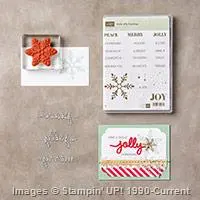
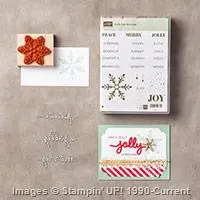
I started with a Kraft card base and stamped the little stars and dots with some Crumb Cake ink.  I then flicked some gold Wink of Stella on top.

I used a square from the Stitched Shapes framelits to cut out the Whisper White square. The sentiment was embossed with Real Red Glitter Stampin’ Emboss Powder.  I love the red sparkle against the white and kraft card base.

noel-pinecones-close-upWe hope you’ll join us and create your own card using the sketch.  I’d love to see what you do with it!  Meanwhile, be sure to journey over to the Freshly Made Sketches site.  I’ve seen what the design team has created this week, and you’ll love it.

Enjoy your Wednesday!  Thanks for stopping by!

Product List

Sugarplum Star of Peace — FMS265

It’s time for another new sketch over at Freshly Made Sketches, and this week our friend from the land down under, Narelle Farrugia,  is our hostess.  Take a look at her fun sketch:

fms-final-265-001Since I’m woefully behind on Christmas cards, I decided to go that route.  I pulled out my Holly Jolly Greetings stamp set, fully intending to place the large snowflake image over a sponged circle.  But it all looked so plain.  I decided a die-cut image was needed, so I pulled out the Starlight Thinlits Dies.

star-of-peace

I started by sponging some Sweet Sugarplum ink on a mask created with a circle die and a scrap piece of cardstock.  With the mask still on, I stamped the stars and dots background with the same ink.

I die cut the star from a Silver Foil Sheet and the sentiment from some Dazzling Diamonds Glimmer Paper.

star-of-peace-close-upWe hope you’ll join us and create your own card using the sketch and post it to the gallery so we can see your own work.  Meanwhile, be sure to journey over to the Freshly Made Sketches site to see what the design team has created for your inspiration.

Enjoy your Wednesday!  Thanks for stopping by!

Product List

Shaker Snowman — Monday Montage #83

monday-montage-banner-october

Welcome to another Monday Montage blog hop!  We are a group of ten stampers who love to share what we create with you, and all you have to do to follow along is click on the links at the bottom of each post.

I hope you had a wonderful Thanksgiving!  I am still recovering from my four-day feeding frenzy.  One of the good (??) things about hosting Thanksgiving dinner is you get lots of yummy leftovers.  It’s the pie that does me in.  My mom makes wonderful pies, especially cherry pie with cherries from her own tree.  It’s a good thing Thanksgiving is just once a year!

I haven’t done much stamping over the past month, so when I sat down to make a card for this hop I was kinda stumped.  I decided to take a look at one of my favorite challenge sites, The Paper Players, for a jump start.  They have a sketch challenge this week, which is just what I needed to get me going.

pp323

I thought it might be fun to make a shaker card.  When I saw the Mica Flakes Trio Pack in the Holiday Catalog, I knew I wanted to make a shaker card with the Snow Place stamp set, which is in the Annual Catalog.

snowman-shaker

I started with a Soft Sky card base and stamped the snowflake images from Snow Place randomly.  The base of the shaker part is a piece of Fancy Frost Specialty dsp and I lightly sponged some Soft Sky ink onto it.  I stamped the cute snowman and cut him out with the coordinating Snow Friends Framelits dies.

snowman-shaker-close-up

The sentiment is from an old Paper Pumpkin stamp set and was cut out with the new Stitched Shapes Framelits Dies.  A bit of pretty Silver Glitter Ribbon and Real Red Baker’s Twine finished it off.

You’re ready to hop on over to Breelin Renwick’s blog.  I always love seeing what she makes!  If you prefer to work your way backwards, you can jump back to Wendy Weixler’s blog.  Either way, be sure to work your way through all of the blogs so you don’t miss a thing.

mondaymontageback-1mondaymontagenext-copy


Enjoy your Monday!  Thanks for stopping by!


Product List

A Jolly Moose — FMS264

It’s good to be back with my friends over at the Freshly Made Sketches site this week.  I’ve been off for a couple of weeks as I had some surgery (Everything is ok now), but I’m ready to jump back into it.  And what a great week to be back!  Look at what our favorite New Zealander, Karren Johnson, has for us:fms-final-264-001I haven’t been able to play with the Jolly Friends set very much and I thought it would work great with this sketch.  The characters in this set are adorable, and I love how you can customize their looks with the accessories included in the set.

jolly-mooseThe moose was stamped onto some kraft cardstock and cut out by hand.  I punched his hat out with the coordinating Jolly Hat Builder Punch.  Very quick and easy!

I used one of the new Stitched Shapes Framelits dies for the circle behind the moose.  A die from the Christmas Greetings Thinlits Dies collection was used to cut out the sentiment from some Cherry Cobbler Glimmer Paper.  The remainder of the sentiment is from the Holly Jolly Greetings stamp set.

jolly-moose-close-upWe hope you’ll play along and make your own card using the sketch.  We love to see what you create!  Meanwhile, be sure to hop on over to the Freshly Made Sketches site to see what the design team has created for your inspiration.

Have a wonderful Thanksgiving, to all of my American friends!  Thanks for stopping by!
Product List

Tags on Bags — Stampin Up! Artisan Blog Hop

Welcome to another Stampin’ Up! Artisan Design Team Blog Hop!  There are 20 of us from around the globe who will be sharing our projects with you twice each month.  All you need to do to follow along is click on the link at the bottom of each post.

Our focus for this blog hop is gift packaging and tags.  How appropriate with the holiday season right around the corner!  I decided to work with the Tin of Tags stamp set and the Cheerful Tags Framelits.

pecan-treatsI love giving homemade treats during the holidays.  It’s fun making them and I love how my house smells on baking days.  One of the treats I like to gift during the Christmas season is Cinnamon Sugar Pecans.  I’ve packaged them up in the Gusseted Cellophane Bags and tied on some tags.

The Cheerful Tags framelits dies make the cutest tags!  I’ve used some of the Candy Cane Lane dsp on these, and different sentiments from Tin of Tags.  You can still use this great stamp set even after using up all of the contents in the coordinating kit.

tags-trioFor two of these tags (the one on the far right and the far left above), I trimmed off parts of the tags to make it work for what I needed.

You’re ready to hop on over to The Netherlands and visit Chantal de Kaste’s blog by clicking on the link below.  You can use Google Translate for any blogs for which you need translation help.  It’s so fun to hop around the world!

bloghop-button_0915-1


Product List

Stitched from the Heart — Stampin’ Up! Artisan Blog Hop

Welcome to another Stampin’ Up! Artisan Design Team Blog Hop!  There are 20 of us from around the globe who will be sharing our projects with you, and for this hop we are all featuring the new Stitched Shapes Framelits dies and the coordinating stamp sets which are currently 25% off.  All you need to do to follow along is click on the link at the bottom of each post.

stitchframelit_demoheader_na

Stampin’ Up! will be releasing some stitched shapes framelits featuring squares, circles and ovals in the next annual catalog.  But rather than making us wait until June, they are releasing them now!  Woohoo!  And as an added bonus, there are 9 coordinating stamp sets that are 25% off through November 30.

The stamp set I am featuring with these awesome dies is the Greetings from Santa set.

One of the things that I love about these dies is how well they work with the Layering Framelits dies.  For this card I’ve layered the new stitched framelit over the scalloped die from the Layering Ovals Framelits.  They layer beautifully!

stitched-peaceI’ve also used the Warmth & Cheer Designer Series Paper Stack for these cards.  I love the pairing of these textile patterns with the stitched dies.

stitched-peace-close-up

While these dies work so well with the Layering Framelits, they also look great on their own.  They add a nice finishing touch to your circles, ovals, and squares.

stitched-list

This card features two of the circle Stitched Shapes Framelits dies.

stitched-list-close-up

I love how the stitching detail draws the eye towards what’s in the circles.

You’re ready to hop on over to The Netherlands and visit Chantal de Kaste’s blog by clicking on the link below.  You can use Google Translate for any blogs for which you need translation help.  It’s so fun to hop around the world!

bloghop-button_0915-1

Here is a list of the stamp sets which are currently on sale and coordinate so well with the new Stitched Shapes Framelits Dies:

Here is a list of the supplies I used on my projects:

Product List

The Only Kind of Cute Mouse — FMS255

We take turns being the hostess over at the Freshly Made Sketches site, and this week I have the privilege of creating and sharing the sketch for the week.  This is what I came up with:

fms-final-255-001

Whenever we go to the pet supply store, my daughters always love to look at the mice, hamsters, and guinea pigs.  I have heard so many pleas to buy one for a pet, but I have never given in.  I love our dog.  I could love a cat (my son is allergic).  But a rodent?  No way!!  They give me the heebie-jeebies!  My daughters think they are cute, but in my book the only kind of cute mouse is the animated mouse (like in “Cinderella”) or the cute mice in the Merry Mice stamp set.

christmouse


This cute little critter was stamped on some Shimmery White card stock and colored with a blender pen and some ink pads — Sweet Sugarplum, Pear Pizzazz, Soft Sky, and Smoky Slate.  A little clear Wink of Stella was added on the nose, ornament, and star.

christmouse-close-up

We hope you’ll join us and create your own card using the sketch!  Meanwhile, be sure to zip on over to the Freshly Made Sketches site to see what the design team has created for  your inspiration.

Enjoy your Wednesday!  Thanks for stopping by!

Product List

A Peek at Pines — FMS252

Another Wednesday, another new sketch over at Freshly Made Sketches!  And this week the fabulous Karren Johnson, our talented friend from New Zealand, is our hostess.  Take a look at this great sketch:

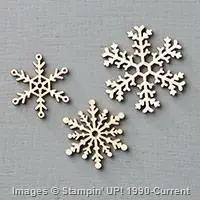
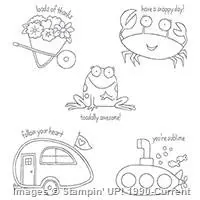
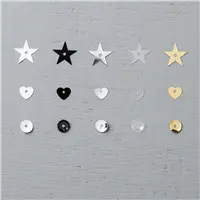
I think I took some creative liberties with this one.  When I saw those four circles, I immediately thought of a collage of fun die-cuts, and I started down a trail far away from four circles.

The new Christmas Pines bundle, which will be available in the new Holiday catalog starting tomorrow, was right at the top of my must-have list.  Fabulous dies, fabulous stamp images and fabulous sentiments are all included in this bundle.

Noel PinesI started with a strip of dsp from the This Christmas dsp package and embossed the sentiment with some of the Real Red Glitter Stampin’ Emboss Powder (yes!  Glittery embossing powder).

I die cut the greenery and pine cones from Garden Green, Pear Pizzazz, Real Red, Kraft, and Early Espresso cardstock with the Pretty Pines Thinlits dies.  A couple of strands of Real Red Baker’s Twine from the Candy Cane Lane Baker’s Twine duo was added as a finishing touch.

Noel Pines Close UpWe hope you’ll join us and make your own card using the sketch!  We love to see what you create.  Meanwhile, be sure to jump on over to the Freshly Made Sketches site to see what the design team has made for your inspiration!

Enjoy your Wednesday!  Thanks for stopping by!

Product List

Christmas Camper — Stampin’ Up! Artisan Blog Hop

Welcome to our first Stampin’ Up! Artisan Design Team Blog Hop!  There are 20 of us from around the globe who will be sharing our projects with you twice each month.  For this post we are each sharing a project with you and a little bit about ourselves so you can get to know all of the team.  So for those of you who already know me, you can skip on down to the project.  🙂

I live in the Dallas area in Texas.  My very supportive husband and I have been married for 20 years (we just celebrated that anniversary this month), and have three children — ages 16, 14, and 11.  Before I had kids, I was a CPA but am now a stay-at-home mom.  I have been a Stampin’ Up! demonstrator for over seven years.  I fell in love with the products the first time I got to play with them.  I love how they all coordinate and are of such great quality.  I love being a demonstrator because it such a joy to see someone who “isn’t creative” make a beautiful card and discover that we can all truly be creative (especially with the right supplies).  🙂

I am so excited to be on this team!  It is really a dream come true, and I am looking forward to getting to know the other team members and to grow creatively.  After having applied to be on this team several times over the years, I am still quite shocked to actually be on it.

Hopefully, you aren’t tired of Christmas cards yet.  For my project today, I used a stamp set from the Annual Catalog and a couple of dies from the Holiday catalog.

Christmas CampingI started by sponging on some Soft Sky ink onto some Thick Whisper White Cardstock.  I stamped the sentiment from Holly Jolly Greetings with Basic Black ink.

The cute camper from the You’re Sublime stamp set was stamped with Jet Black Staz-On ink onto Watercolor Paper.  I watercolored it with Real Red, So Saffron, Smoky Slate, Basic Gray and Mossy Meadow inks using an aquapainter.

I used the Perfect Pines Framelits Dies to cut out the tree and a Christmas Greetings Thinlits die to cut out the sentiment from a Silver Foil sheet.

Christmas Camping Close UpI added a few embellishments here and there, but kept it pretty clean, which is typically more my true style.

You’re ready to hop on over to The Netherlands and visit Chantal de Kaste’s blog by clicking on the link below.  You can use Google Translate for any blogs for which you need translation help.  It’s so fun to hop around the world!

Bloghop button_0915

Enjoy your Thursday!  Thanks for stopping by!


Presents under the Trees — Monday Montage #57

Monday Montage Banner -- OctoberWelcome to another Monday Montage blog hop!  There are ten of us who love to share what we create, and all you have to do to follow along is click on the links at the bottom of each post.

Now that Thanksgiving is over, there is no denying that Christmas is quickly approaching. I just need to embrace it and dive right in, so I decided to make a Christmas card for today.

I pulled out my Peaceful Pines set and coordinating framelits because I have so much fun decorating these cute trees.   I went with a traditional colors scheme of red and green, more specifically — Cherry Cobbler, Old Olive and Mossy Meadow.  I also threw in some touches of gold because I have been a little obsessed with gold accents lately.

Trees with PresentsI started with a Crumb Cake card base and layered on a sheet of the Holidays Fancy Foil Designer Vellum.   Then I took a piece of Whisper White card stock and stamped some little stars and dots from the Holly Jolly Greetings stamp set with gold ink.  I added some gold thread and sequins and a fun Snowflake Element and Metal Rimmed Pearl.

I stamped the trees with Versamark ink and used clear and white Stampin’ Emboss Powder on Old Olive and Mossy Meadow card stock, and then cut them out with the Perfect Pines Framelits Dies.  The sentiment was cut with a Christmas Greetings Thinlit die from Red Glimmer Paper, and the “Christmas” is a stamp from the Holly Jolly Greetings set, which I embossed with Gold Embossing Powder.

Trees with Presents Close UpThis would not be a card I would want to mass produce, but it’s perfect to send to a special someone.

You’re ready to hop on over to Breelin Renwick’s blog for a huge dose of beautiful creativity.  If you prefer to work your way backwards, you can hop over to Wendy Weixler’s inspiring blog.  Either way, be sure to work your way through all ten links.

mondaymontageback (1)mondaymontagenext copy

When creating this card, I decided to play along with Sandy’s current challenge at The Paper Players.  I haven’t done that in a while, and they always have great challenges.

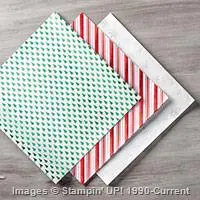
I went with the “Patterned Paper, Sparkle or Shine, and Tree” column.  Or I could say I went with the “Snowflake, Sparkle or Shine, and Punch or Die-Cut” diagonal.  Or how about the “White, Embossing, and Punch or Die-Cut” column.  Just call me indecisive!

Enjoy your Monday!  Thanks for stopping by!